この記事は更新から24ヶ月以上経過しているため、最新の情報を別途確認することを推奨いたします。
はじめに
なぜNode.js開発でVisual Studio Code(以下、VSCode) なのか?
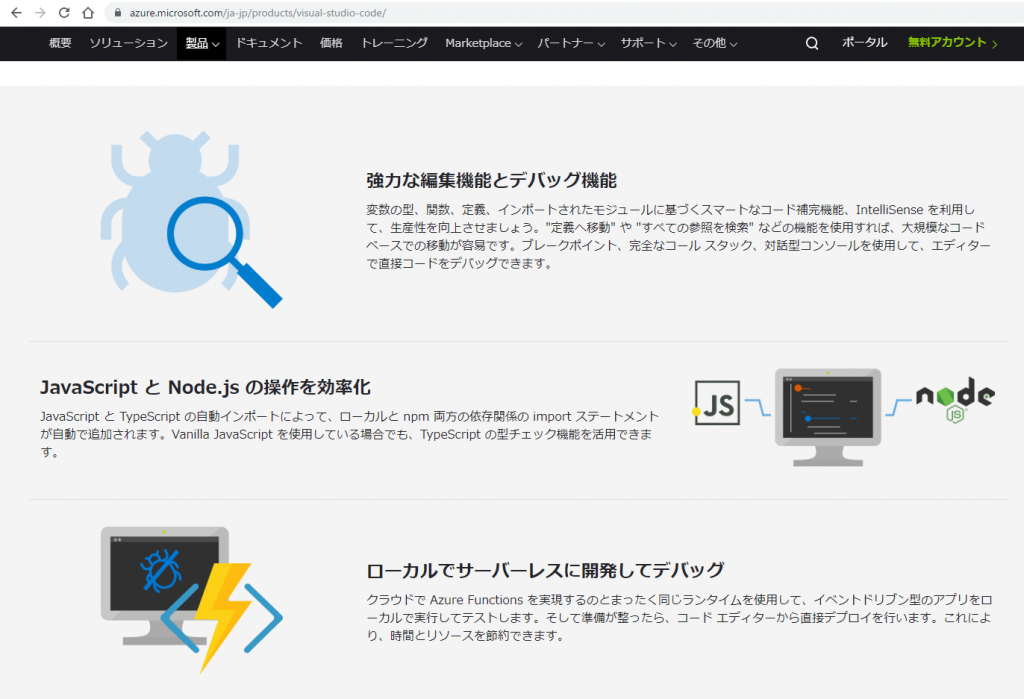
VSCodeではJavaScriptとNode.jsの操作を効率化する機能が充実しています。
イメージしやすい点で言えば
・ソースエクスプローラとターミナルの操作を1ウィンドウで行える
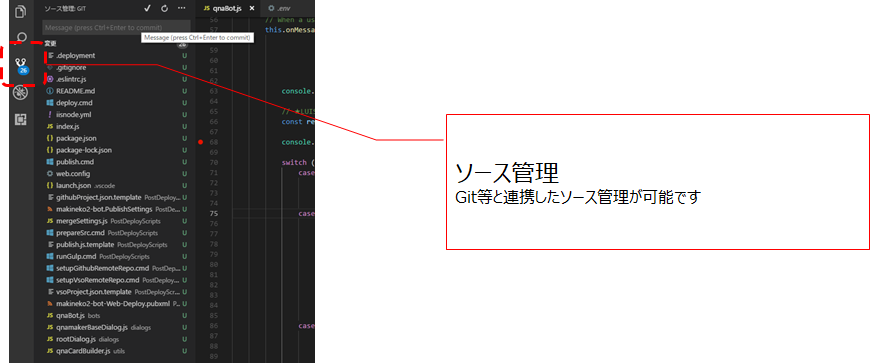
・Git等のコード管理ツールにアクセス可能
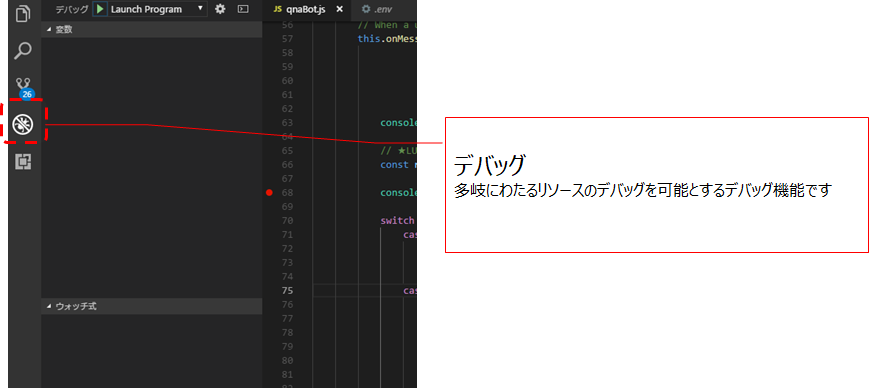
・コードの静的解析やデバッグをシームレスに実現
・軽い とにかく 軽い
私の現環境では Node.js の開発ツールとしては、VSCode一択です。
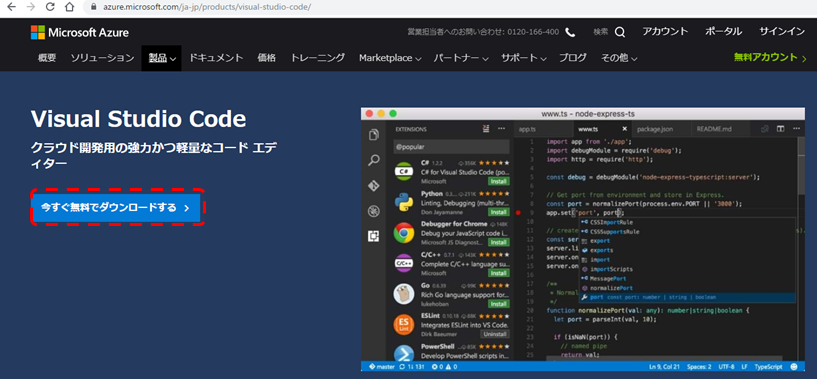
ダウンロード
https://azure.microsoft.com/ja-jp/products/visual-studio-code/
簡単に機能の説明
VSCodeの機能を簡単に説明します。
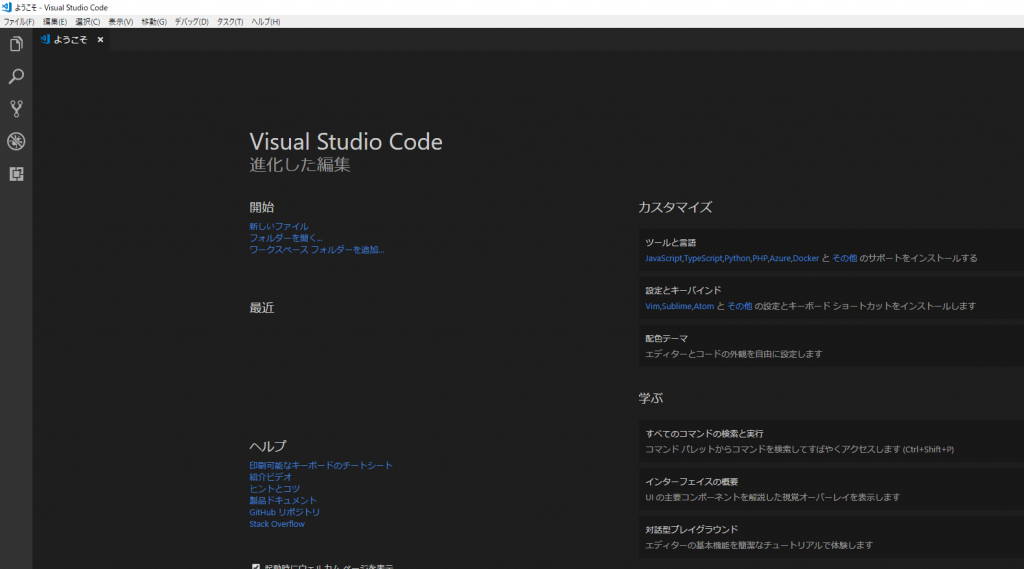
ウェルカム画面
こちらはVSCode起動直後に表示されるウェルカム画面です
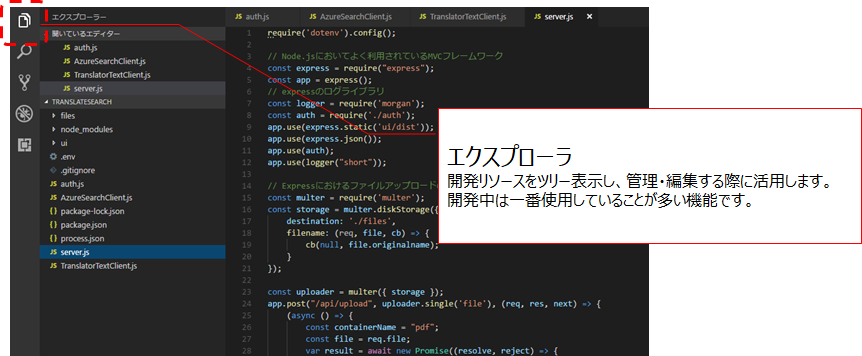
エクスプローラ
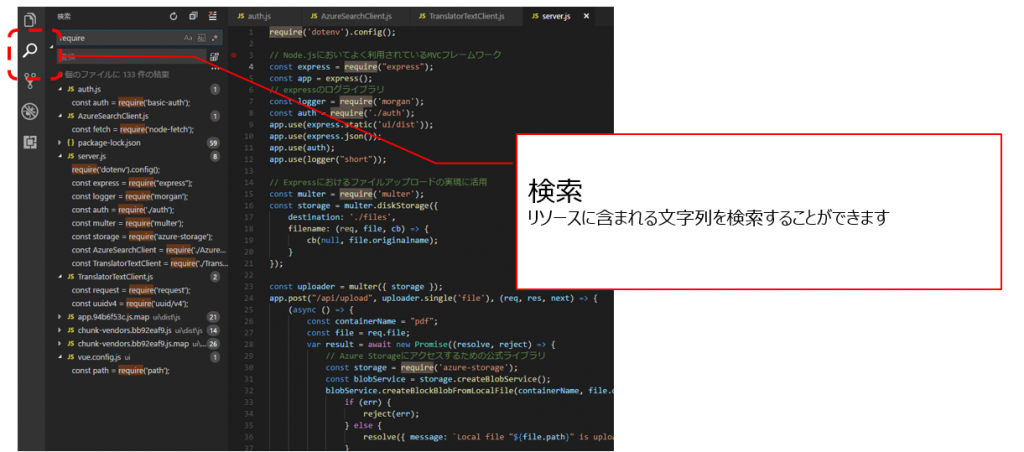
検索
ソース管理
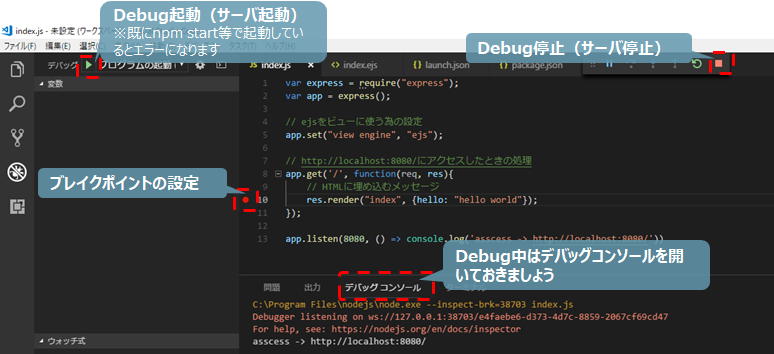
デバッグ
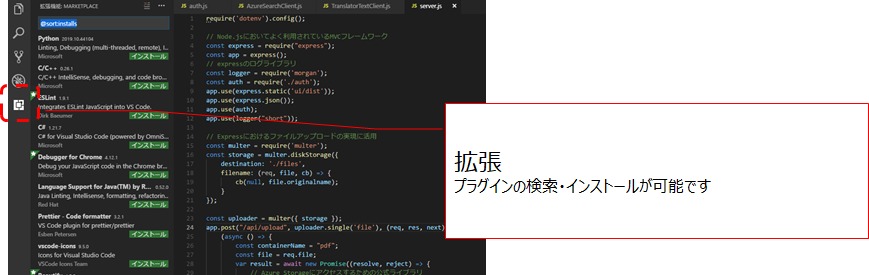
拡張
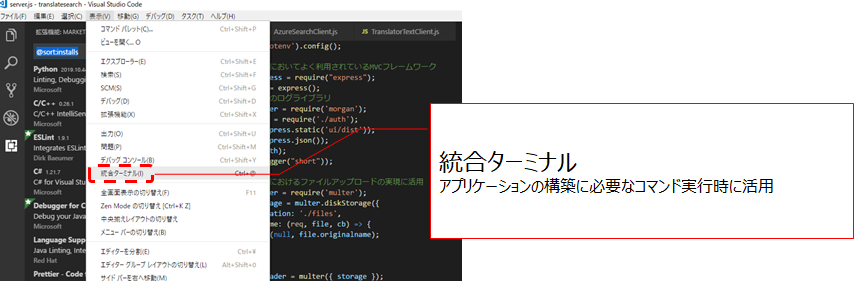
統合ターミナル
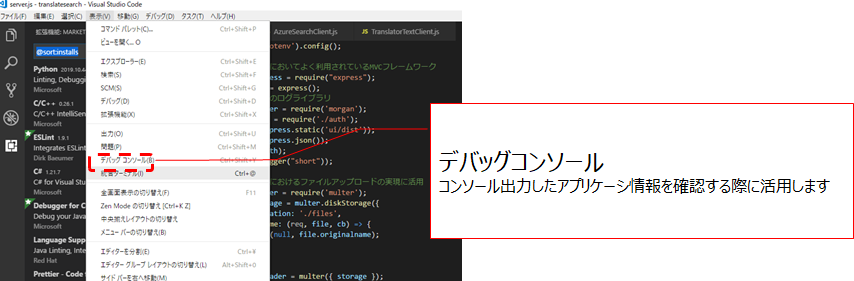
デバッグコンソール
helloworldしてみる
ベースプロジェクトを作成する
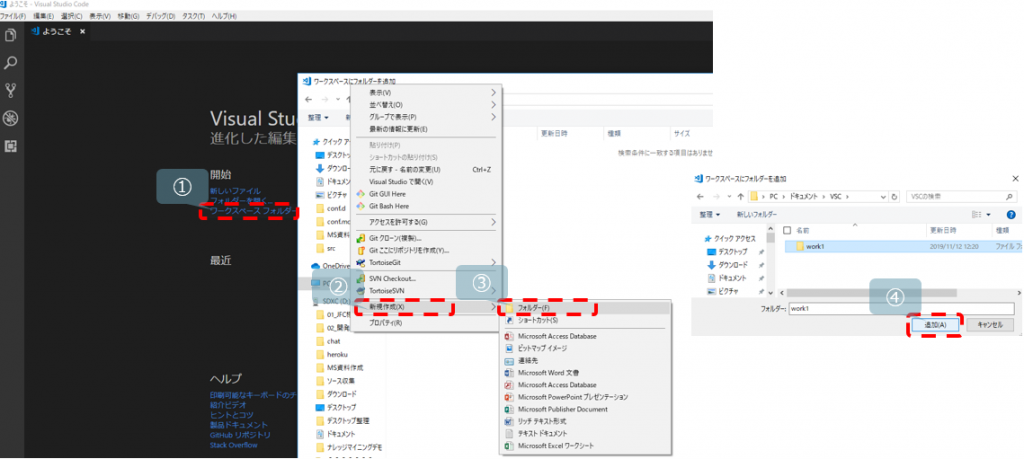
1.ワークスペースを作成します
2.ターミナルでnpm initする
npm init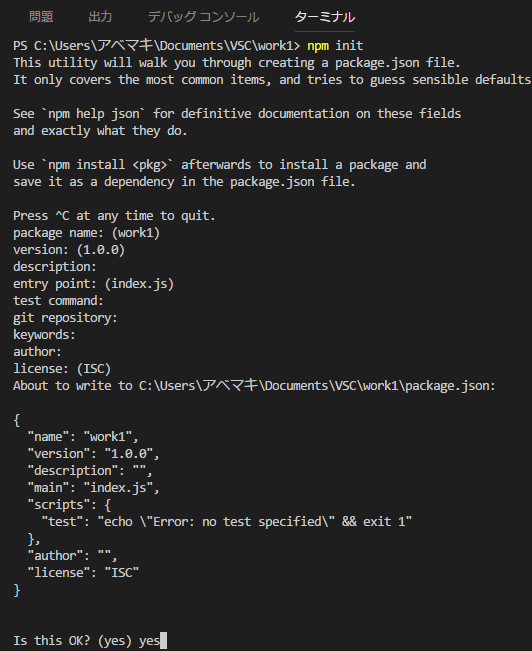
3.ターミナルでexpressとejsをプロジェクトにインストールする
npm install express ejs --save
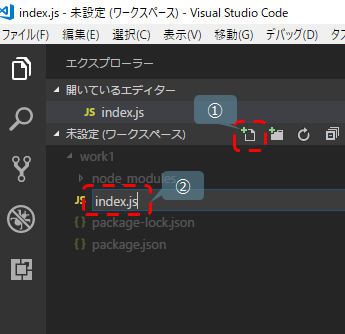
4.新規ファイル作成を行います
5.作成したファイルに処理を入力します
var express = require("express");

var app = express();


// ejsをビューに使う為の設定
app.set("view engine", "ejs");


// http://localhost:8080/にアクセスしたときの処理
app.get('/', function(req, res){
// HTMLに埋め込むメッセージ
res.render("index", {hello:"hello world"});
});


app.listen(8080, () => console.log('asscess -> http://localhost:8080/'))
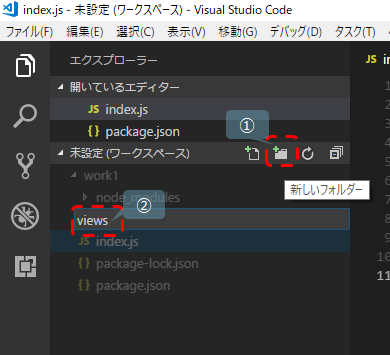
6.viewsフォルダを作成します
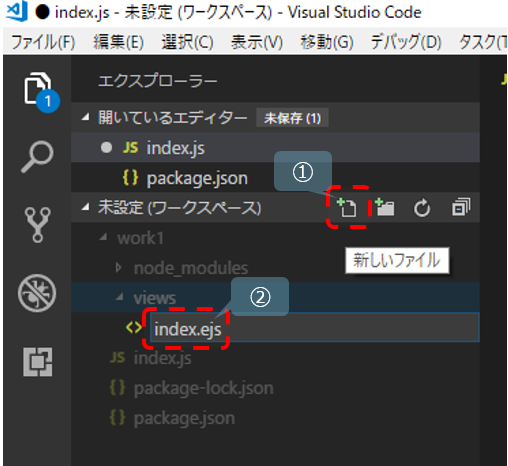
7.viewsフォルダ配下にindex.ejsを作成します
8.作成したファイルにデザインを入力します
<!DOCTYPE html>
<html>
<head>
    <meta charset="utf-8" />
    <title><%= hello %></title>
</head>
<body>
    <%= hello %>
</body>
</html>
9.package.jsonに『“start”: “node ./index.js”,』を追記します
“start”: “node ./index.js”,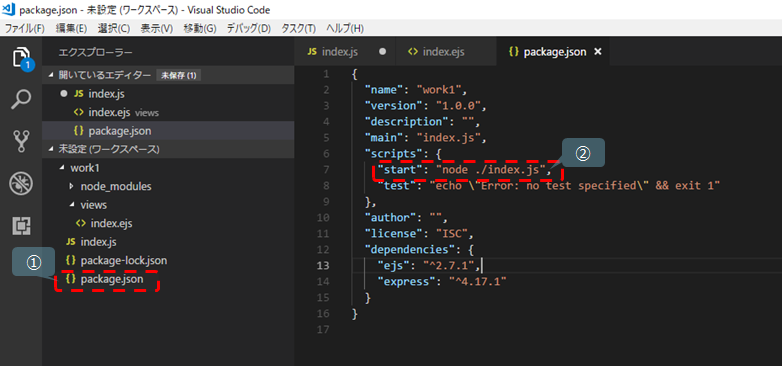
10.ターミナルでnpm startします
package.jsonのscriptsのstartに設定した内容に従ってプロジェクトを実行するコマンドです
スタートして以下のような表示が出たら、Ctrlキーを押しながらリンク先を表示します
asscess -> http://localhost:8080/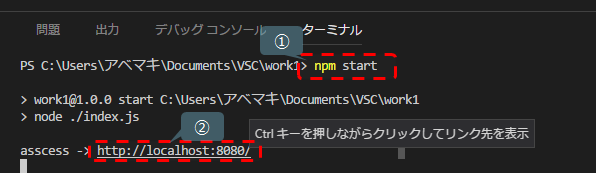
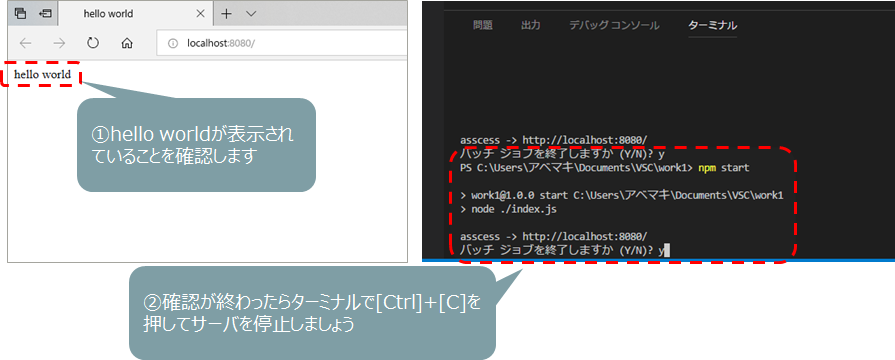
11.ブラウザ上でhello worldを確認したら確認完了です
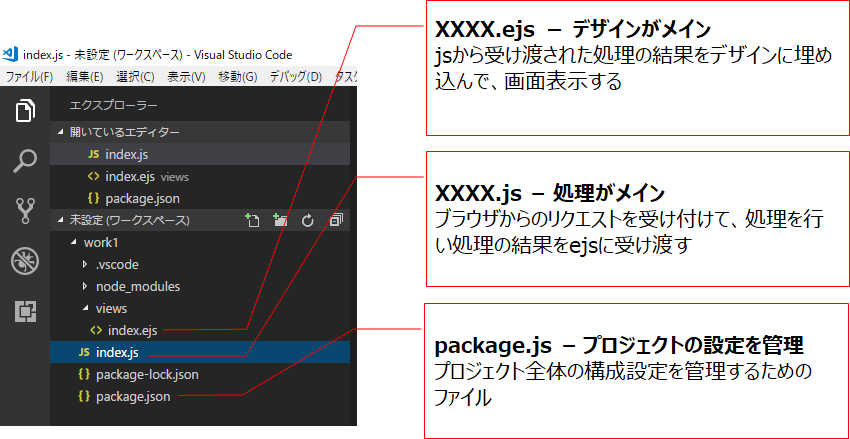
12.ここまでの考え方
13.Debugモードを使いこなすための設定
設定手順
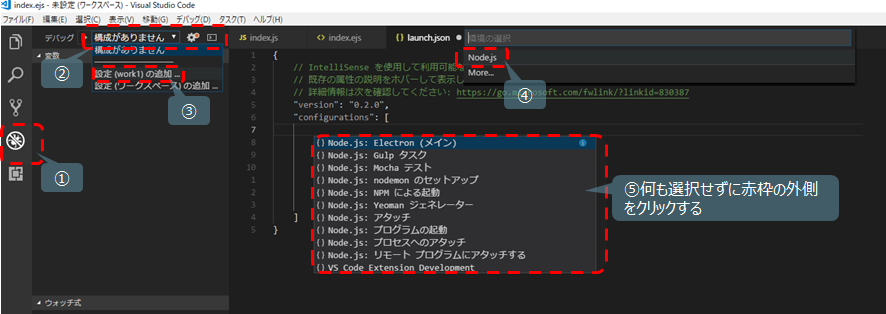
以下のような設定ができていたら設定完了です
{
    // IntelliSense を使用して利用可能な属性を学べます。
    // 既存の属性の説明をホバーして表示します。
    // 詳細情報は次を確認してください: https://go.microsoft.com/fwlink/?linkid=830387
    "version": "0.2.0",
    "configurations": [

        {
            "type": "node",
            "request": "launch",
            "name": "プログラムの起動",
            "program": "${workspaceFolder}\\index.js"
        }
    ]
}
14.Debugモードの使い方
 (この記事が参考になった人の数:19)